These days, a project or a website rarely stays on one computer while under development. Yes, many exceptions will be there to this, but the need to port a webapp project to a different computer arises from time to time. I hope most of the people know how to do this and keep using the same database as on the original machine where it all started. Porting a simple website without any database requirements is just quite easy, and I'm sure there might be some people who are confused about how to port their databases and the website to another computer. There are just a few things to take care about in the whole process, and I will try my best to keep things as clear as possible. So, lets get started!!
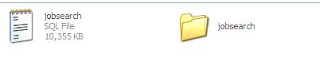
As a sample of the project to be ported, I'm taking a PHP and MySQL based project which has been recently developed by me called 'JobSearch'. The name of the database which has been used is also 'jobsearch'. Now I have finished this project and a friend of mine needs to run it on his computer. He has got WampServer installed (See how to do it), and has received the 'jobsearch' folder containing the PHP website files along with the jobsearch.sql database file. The files received are these:
Lets start the step-by-step procedure now.
Steps
1. Copy the folder 'jobsearch' to 'C:\wamp\www' folder.
2. Open a browser, say Google Chrome, and type 'localhost' in the address bar and press enter.

3. Under Tools, navigate to 'phpMyAdmin'.
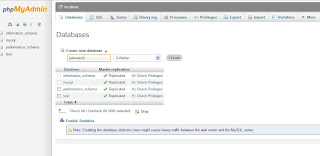
4. Click 'Databases' and in create new database, type 'jobsearch' and click Create.
5. READ NOTE FIRST BEFORE EXECUTING THIS STEP
Click on the database 'jobsearch' located in left side. In the next page, click 'Import' in the top menu. Under 'File to Import', browse to the 'jobsearch.sql' file on your hard drive and click Go at the bottom of that page. Make sure you're inside the jobsearch database and importing inside it. meaning you're using Import on that page which is shown after clicking on jobsearch database.


NOTE: If your file size is less than the default limit, the database will be imported. But in case the size is bigger than the limit, you will need to change some codes in php.ini file.
In my case, 'jobsearch.sql' is bigger than the specified limit here, so changes in php.ini file are required.
To make the changes, follow these sub-steps:
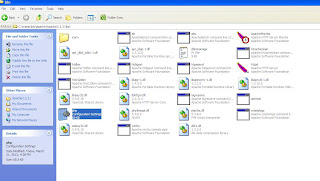
1. Go to 'C:\wamp\bin\apache\Apache2.2.21\bin' folder and open php.ini file.
2. Press Ctrl+F keys and in the search query, type 'upload_max_filesize' and click find. Change the value in front of it to 20M.

3. Again press Ctrl+F keys and type 'post_max_size'. Change the value in front of it to 25M. If error like text not found is shown, just move your curso to the beginning of the file and do the search again.

4. Now, search for 'memory_limit' by again using Ctrl+F or search feature, and change the value in front of it to 256M.

5. Now exit the WampServer by right clicking on it at the bottom-right side in taskbar and selecting Exit. Now, again start WampServer from shortcut on Desktop or start menu.
6. Left-click on WampServer in the taskbar, select MySQL and MySQL console. See the image below.

7. Type these two commands in the console as shown in above image, and press enter.
set global net_buffer_length=1000000;
set global max_allowed_packet=1000000000;
Now, there won't be any error about large sized file while importing. So you can now execute step 5. In database jobsearch, click Import in upper right menu and select the file 'jobsearch.sql' and click Go. See step 5 for details.
We've now successfully imported our MySQL database by tweaking the settings of maximum upload limits in PHP and Apache. Now, the project has been successfully ported.
Go to localhost in your browser, and click on jobsearch under projects. You're all set!
In case you have any trouble, let me know.! :)
As a sample of the project to be ported, I'm taking a PHP and MySQL based project which has been recently developed by me called 'JobSearch'. The name of the database which has been used is also 'jobsearch'. Now I have finished this project and a friend of mine needs to run it on his computer. He has got WampServer installed (See how to do it), and has received the 'jobsearch' folder containing the PHP website files along with the jobsearch.sql database file. The files received are these:

Lets start the step-by-step procedure now.
Steps
1. Copy the folder 'jobsearch' to 'C:\wamp\www' folder.
2. Open a browser, say Google Chrome, and type 'localhost' in the address bar and press enter.

3. Under Tools, navigate to 'phpMyAdmin'.
4. Click 'Databases' and in create new database, type 'jobsearch' and click Create.

5. READ NOTE FIRST BEFORE EXECUTING THIS STEP
Click on the database 'jobsearch' located in left side. In the next page, click 'Import' in the top menu. Under 'File to Import', browse to the 'jobsearch.sql' file on your hard drive and click Go at the bottom of that page. Make sure you're inside the jobsearch database and importing inside it. meaning you're using Import on that page which is shown after clicking on jobsearch database.


NOTE: If your file size is less than the default limit, the database will be imported. But in case the size is bigger than the limit, you will need to change some codes in php.ini file.
In my case, 'jobsearch.sql' is bigger than the specified limit here, so changes in php.ini file are required.
To make the changes, follow these sub-steps:
1. Go to 'C:\wamp\bin\apache\Apache2.2.21\bin' folder and open php.ini file.

2. Press Ctrl+F keys and in the search query, type 'upload_max_filesize' and click find. Change the value in front of it to 20M.

3. Again press Ctrl+F keys and type 'post_max_size'. Change the value in front of it to 25M. If error like text not found is shown, just move your curso to the beginning of the file and do the search again.

4. Now, search for 'memory_limit' by again using Ctrl+F or search feature, and change the value in front of it to 256M.

5. Now exit the WampServer by right clicking on it at the bottom-right side in taskbar and selecting Exit. Now, again start WampServer from shortcut on Desktop or start menu.
6. Left-click on WampServer in the taskbar, select MySQL and MySQL console. See the image below.

7. Type these two commands in the console as shown in above image, and press enter.
set global net_buffer_length=1000000;
set global max_allowed_packet=1000000000;
Now, there won't be any error about large sized file while importing. So you can now execute step 5. In database jobsearch, click Import in upper right menu and select the file 'jobsearch.sql' and click Go. See step 5 for details.
We've now successfully imported our MySQL database by tweaking the settings of maximum upload limits in PHP and Apache. Now, the project has been successfully ported.
Go to localhost in your browser, and click on jobsearch under projects. You're all set!
In case you have any trouble, let me know.! :)


